What causes System Restore 00×80070005 Error Code?
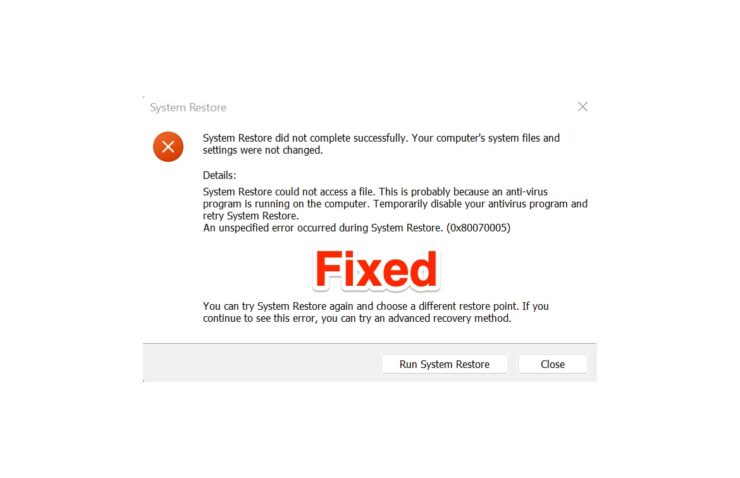
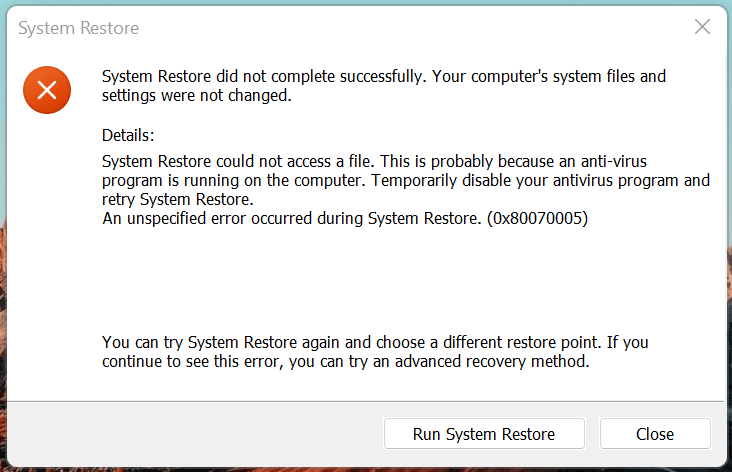
We have to take several points into account then conclude, and it will help the users prevent the error in the distant future. We depend on the System Restore and expect the feature to save us when things go wrong with the software. I have provided valid reasons why 0x80070005 showing up on your screen. Antivirus: Microsoft is not pushing Windows Security as the primary security solution and integrating the third-party antivirus with the security shields. System Restore is a complex feature, and it is trying to restore the settings, drivers, files, and configuration to an earlier point. Your antivirus system is responsible for keeping the machine secure, and it cannot allow the feature to modify the files. I have shared the solution below, and you can check it out to prevent the 0x80070005 in Windows 11. Details: System Restore could not access a file. This is probably because an anti-virus program is running on the computer. Temporarily disable your antivirus program and retry System Restore. An unspecified error occurred during System Restore. (0x80070005) You can try System Restore again and choose a different restore point. If you continue to see this error, you can try an advanced recovery method.” Broken Point: The system restores point is broken, and one or more files have tampered with/broken. We don’t know what happened to the restore point, but it’s broken, and we cannot do anything about it. However, I have shown you a solution below, and you can try it to restore the system. Pirated Windows: Microsoft released Windows 10 free version that doesn’t ask for a license key to counter pirated Windows OS. Unfortunately, I have seen computer stores activate the software using pirated programs. Many account administrators have no idea that it is tampering with the system security, and they are allowing the privacy invaders to access the machine. I have provided information on how you can resolve the pirated Windows issue in the latter part. Malware: I wouldn’t be surprised if your machine is infected with worms, malware, virus, and other kinds of threats. In 2022, the world has seen over 100 million malware pieces, and it was targeting the average consumer. Privacy invades want to take the corporate employee’s data hostage and demand money in exchange for the unlock key. Data is the new kind of oil, and privacy invaders are trying what they can to steal the information. I have shown you what to do about the Windows computer infected with malware.
1. Disable Antivirus System
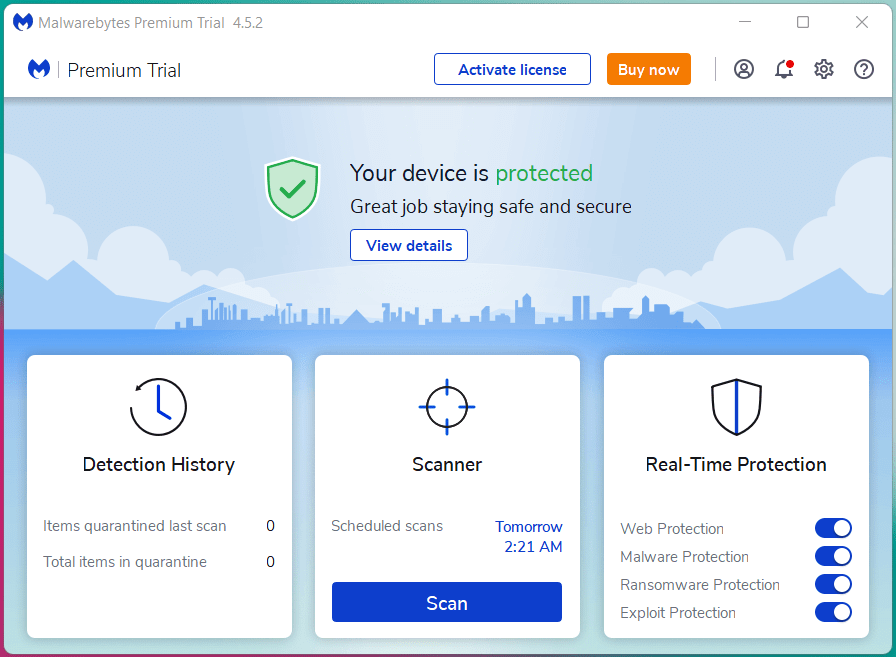
I always had two antivirus systems installed on the machine, but I had Malwarebytes installed in the laptop during the system store. You must have a security system from a different provider, but it won’t change the solution. Disable the antivirus system for the time being and make sure to turn off the network. I recommend you turn off the Wi-Fi router and remove the LAN cable. Try to restore the system to an earlier point, and don’t worry about the final results. You should connect the Windows laptop to the charging socket to avoid the process midway due to low battery.
2. Choose Hidden Restore Point
Windows automates restore points by default, but the feature is disabled in some machines. I recommend the users try another restore point or choose a closer restore point to your selected point. Allow me to show you how you can find the hidden options in system restore in Windows 11 or earlier versions.
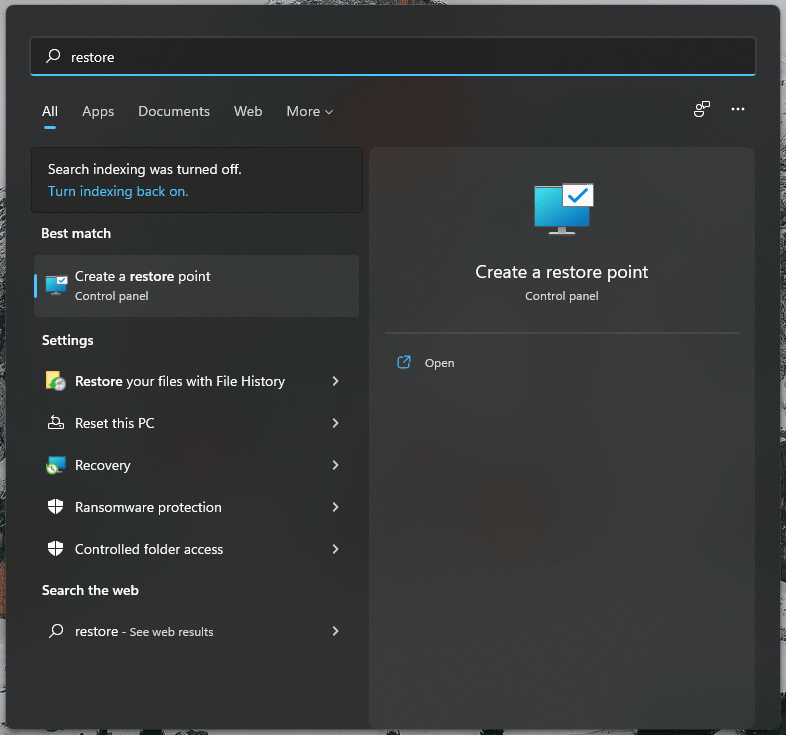
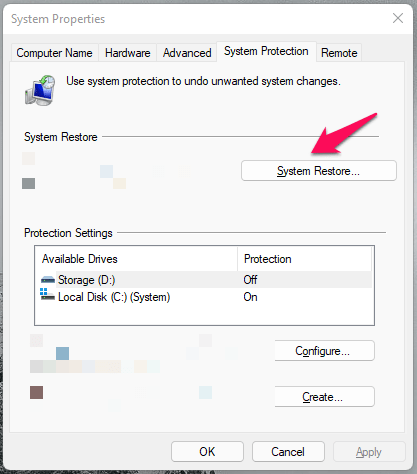
Open “Create a restore point” from the search bar.
Click on “System Restore” in the next tab.
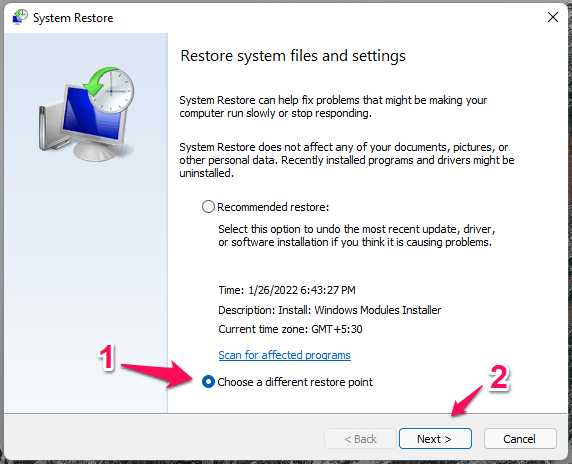
Select “Choose a different restore point,” then click on the “Next” button.
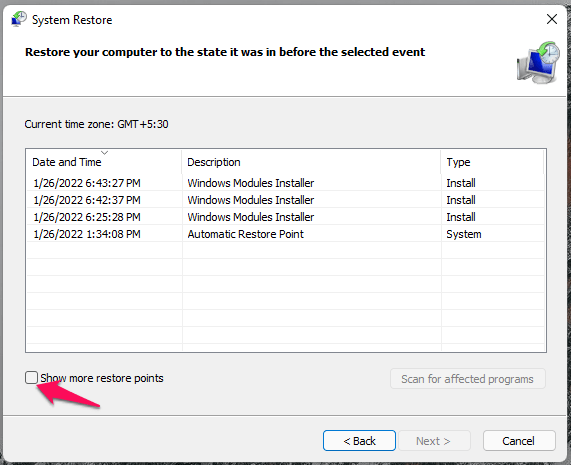
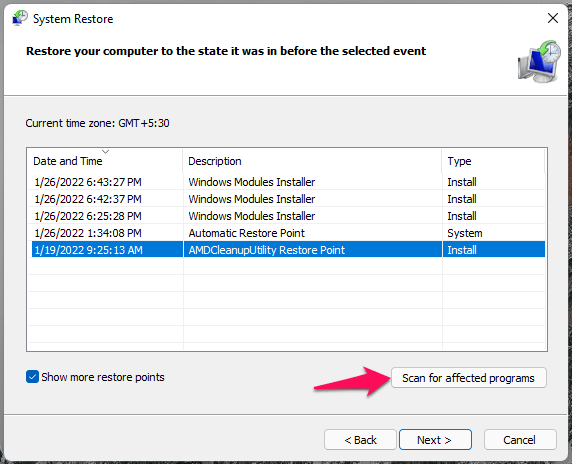
Tick “Choose more restore points” to view hidden points.
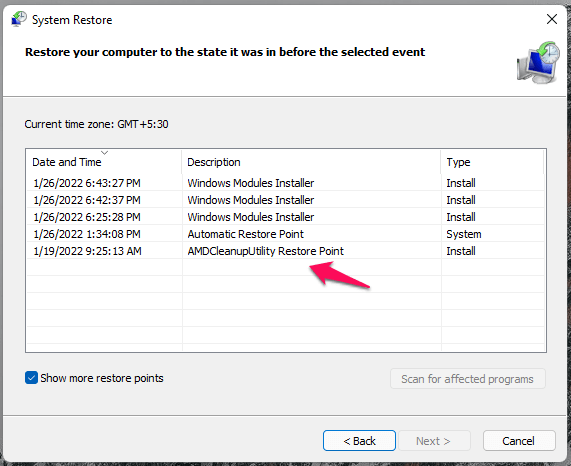
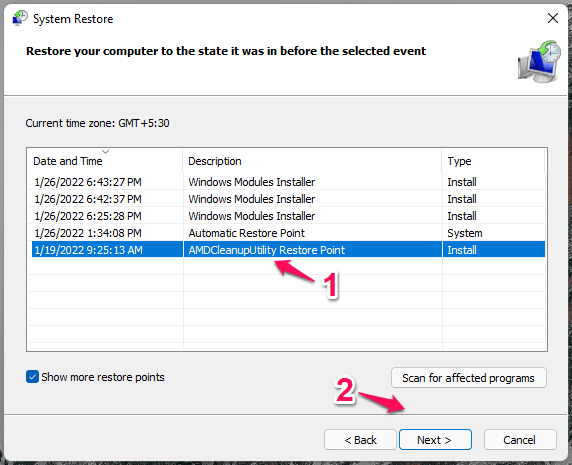
Select the hidden restore point if it is closer to what you want to achieve.
Click on “Scan for affected programs”, so you can determine if it is the best version yet.
Select the restore point, then click on the “Next” button.
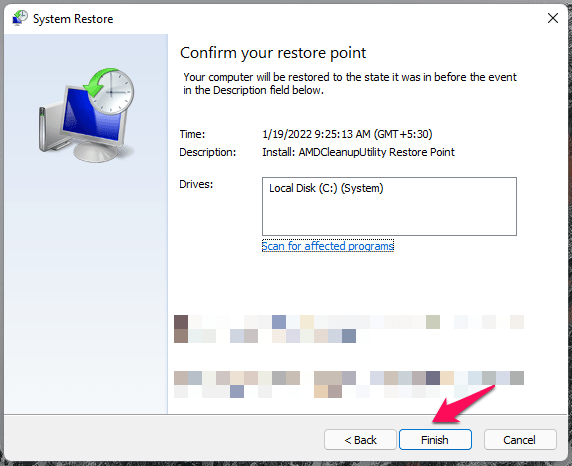
Click “Finish” to start the initiative.
Your PC restarts and begins restoring the system, so you have to wait for a minimum of ten minutes to twenty minutes for the process to finish. Most of the SSD-powered machines do the task quickly, and it is well-known knowledge that hard drives are slower.
3. Restore System in Safe Mode
Microsoft added Safe Mode in Windows 95 edition, and it was continued in the latest version. The SM loads necessary Windows drivers and services, leaving the third-party drivers, services, and programs in offline mode. Restore the system in SM, and there will be no one to interrupt the process. I will show you how to enter safe mode and perform the system restoration without limitations.
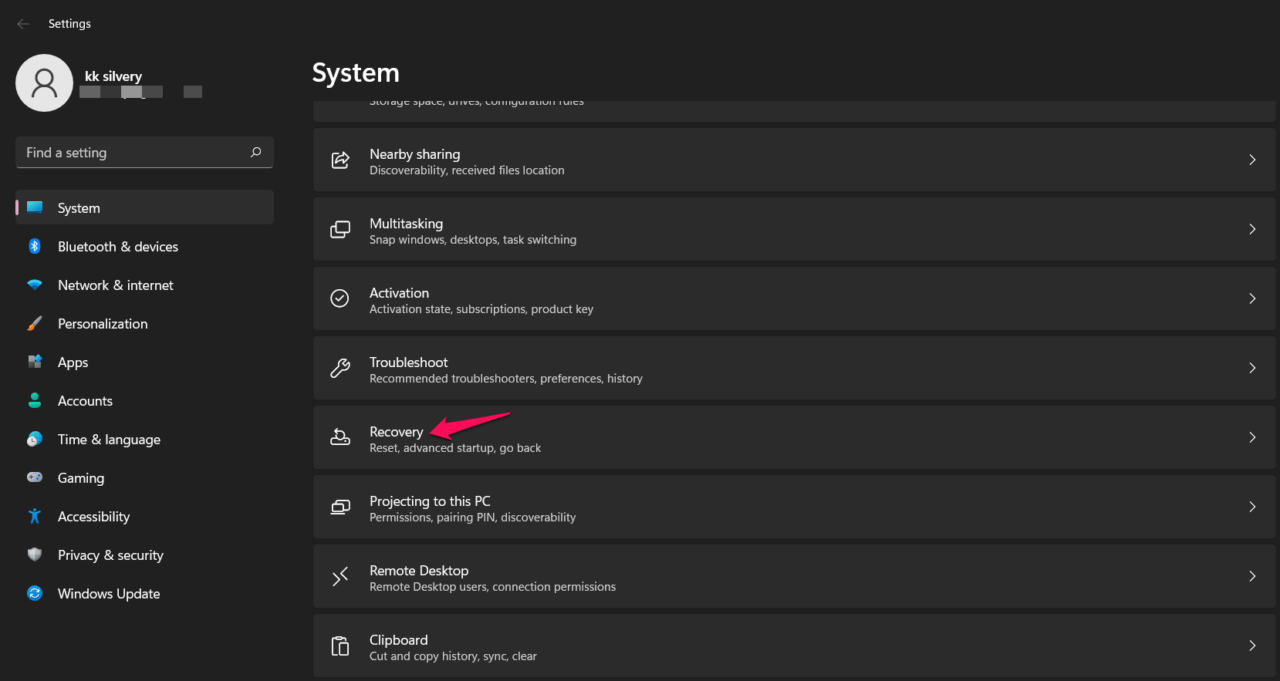
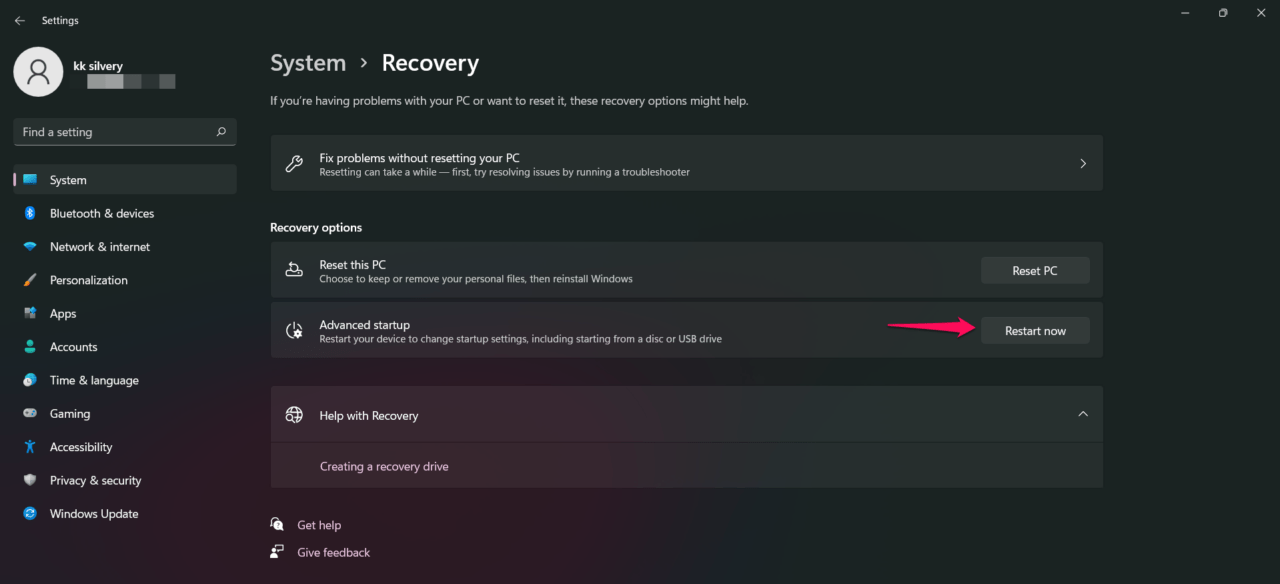
Press the Windows Key + I simultaneously.Click on the “Recovery” options under the “System” section.
Click on the “Restart now” button.
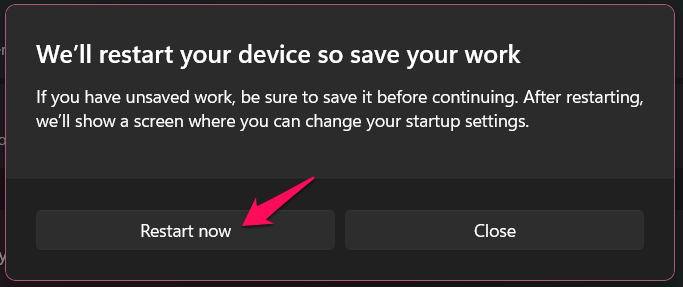
A confirmation pop-up shows up, and click on “Restart now.”
Your PC will restart, and the Windows 11 logo appears with a “Please wait for” message.
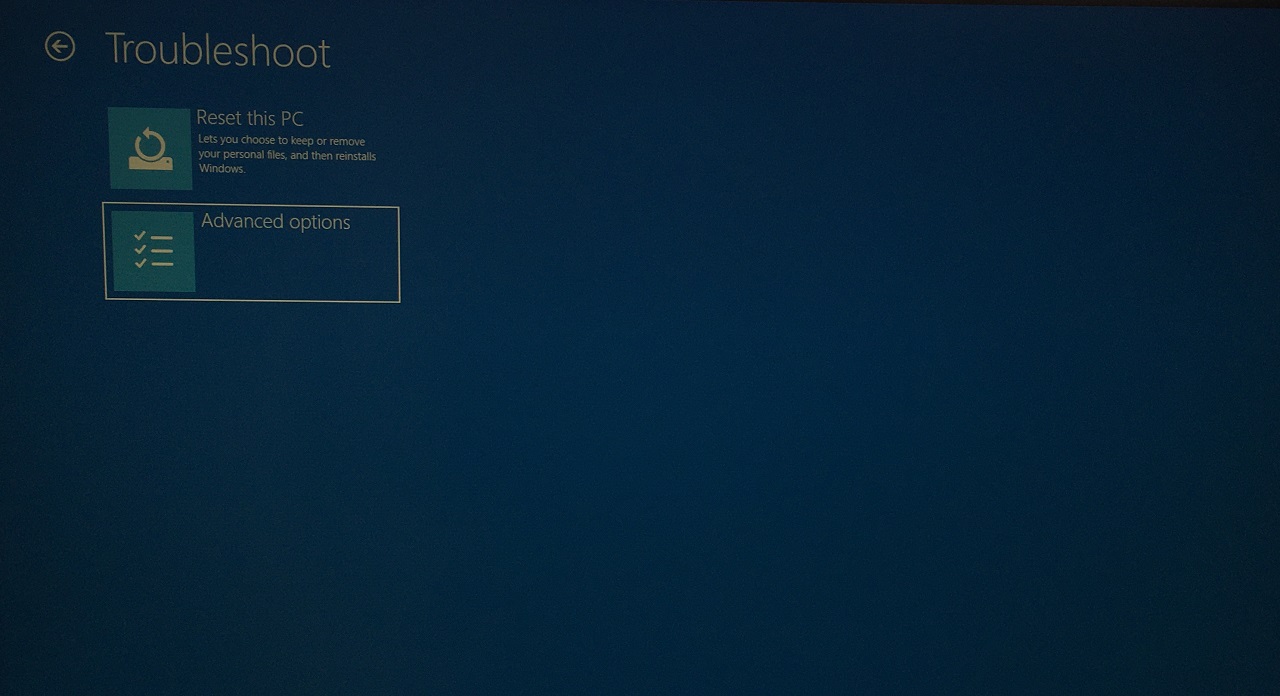
Click on the “Troubleshoot” option.
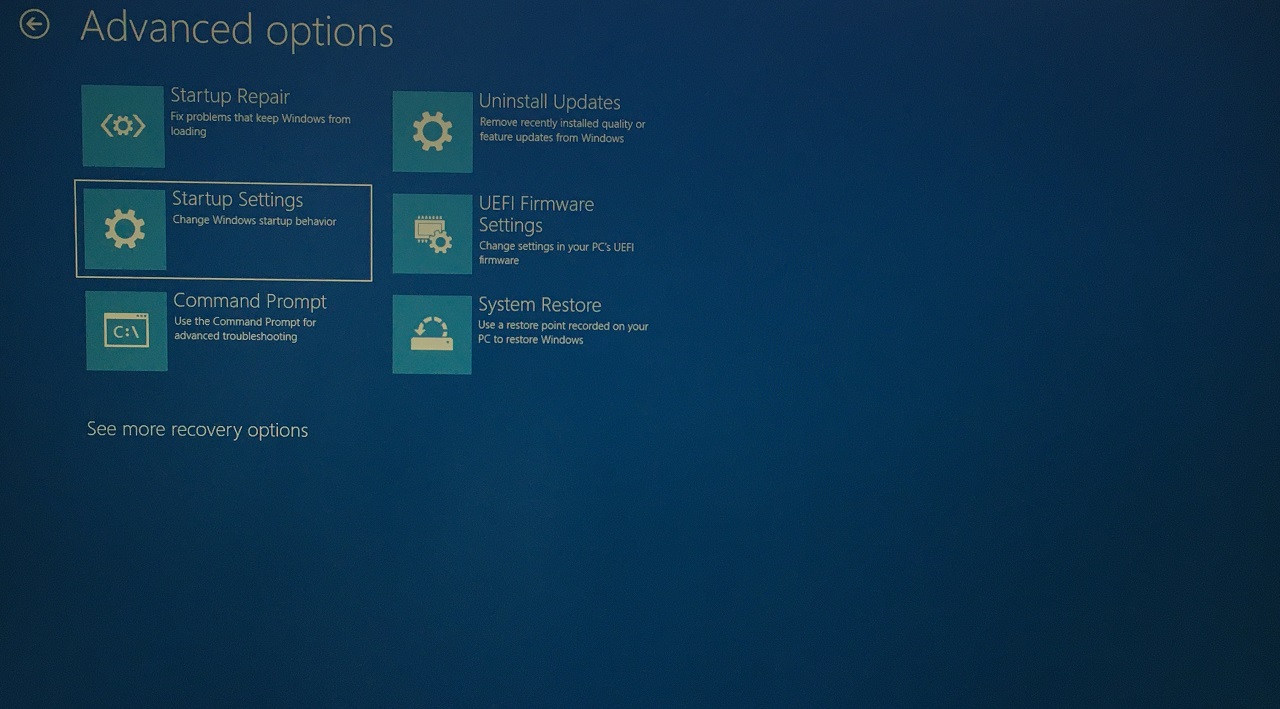
Click on “Advanced options” to continue.
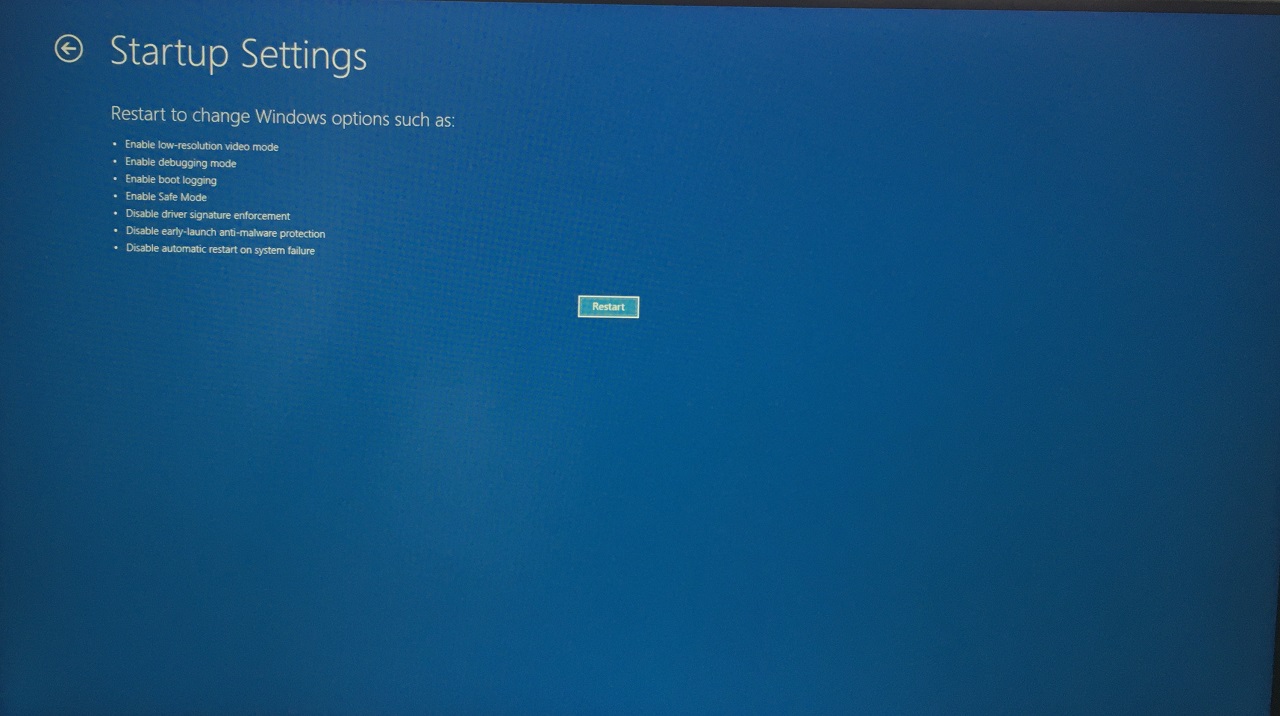
Click on “Startup settings”.
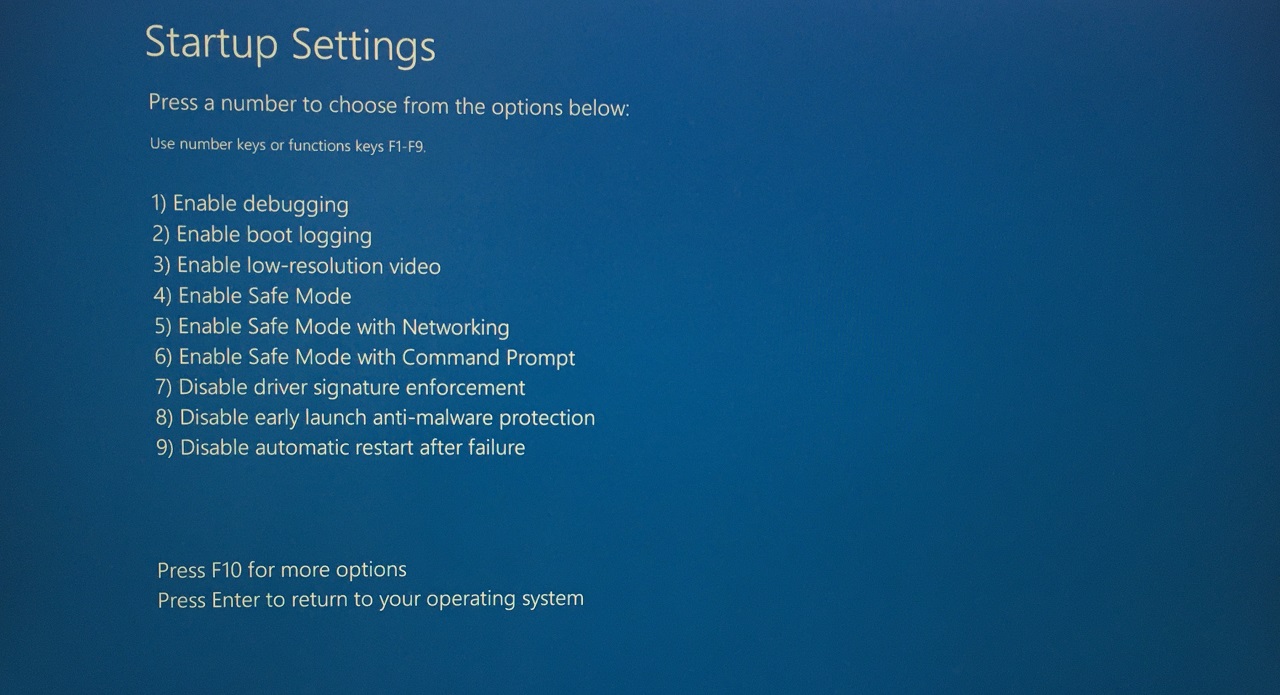
Press the Enter key.
Press 4 keys from the keyboard.
Now, you are greeted at the Lock Screen, and this is in Safe Mode. Launch System Restore and try to restore the system to an earlier point. You have to restart the PC, and it will boot back into Windows normal mode.
4. Use DISM Tool
The Deployment Image Servicing and Management (DISM) is a powerful built-in tool in Windows machines. Users can make good use of the DSIM tool and restore disk health. There is no harm in running the DSIM tool, and it will scan the machine to repair the system images. You should switch to a Windows administrator account to use the commands.
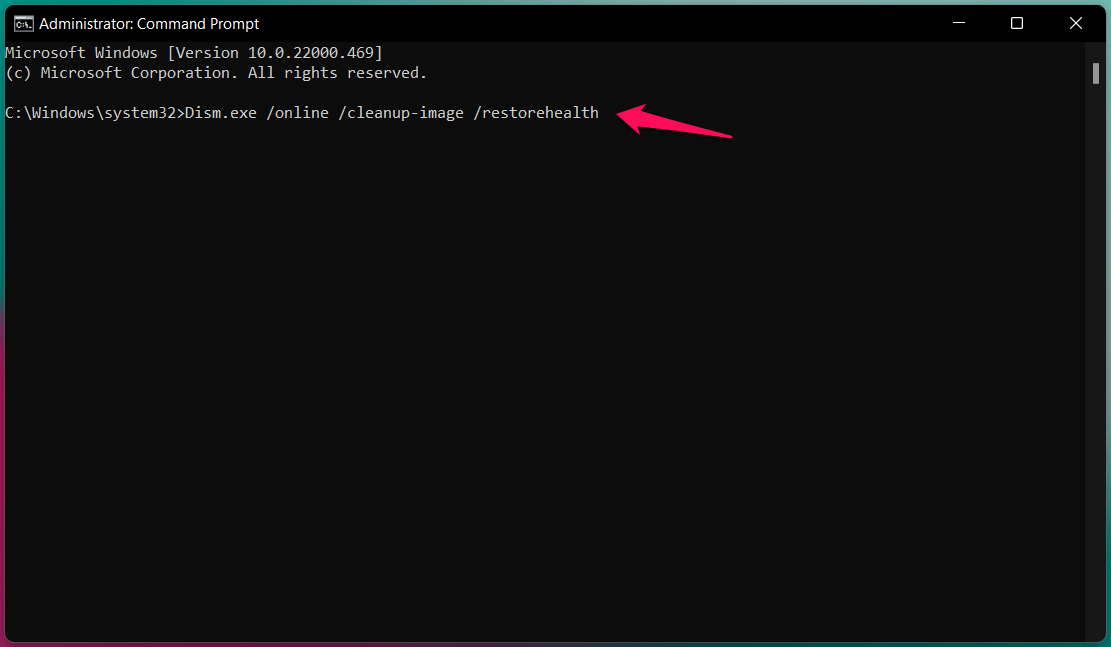
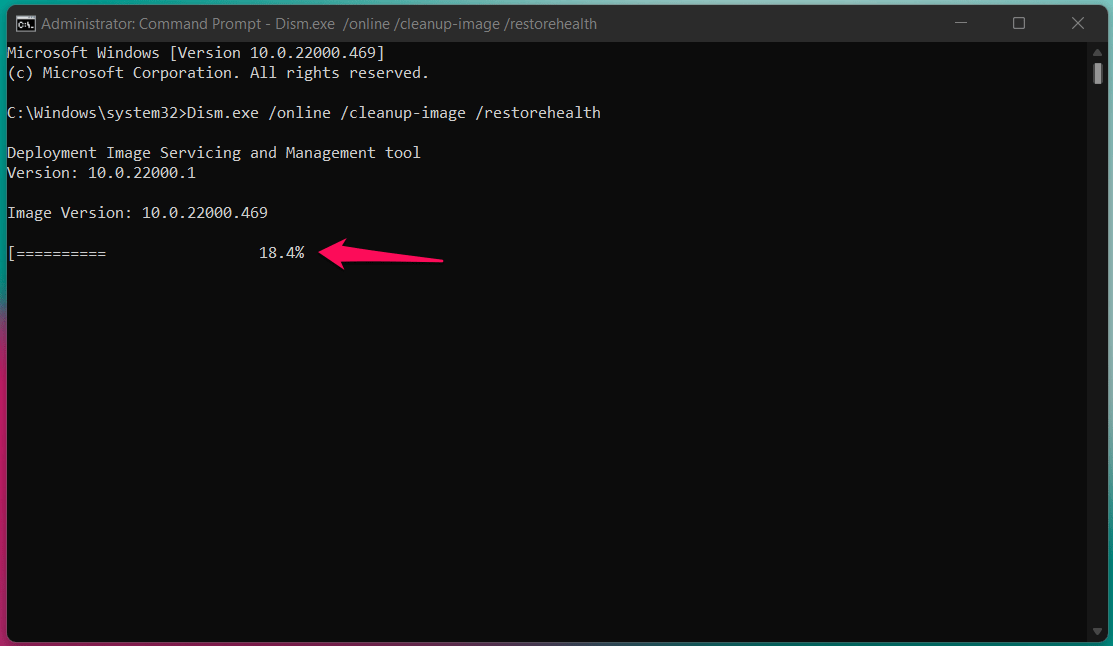
Open Command Prompt as administrator.Copy & paste Dism.exe /online /cleanup-image /restorehealth in the command prompt.
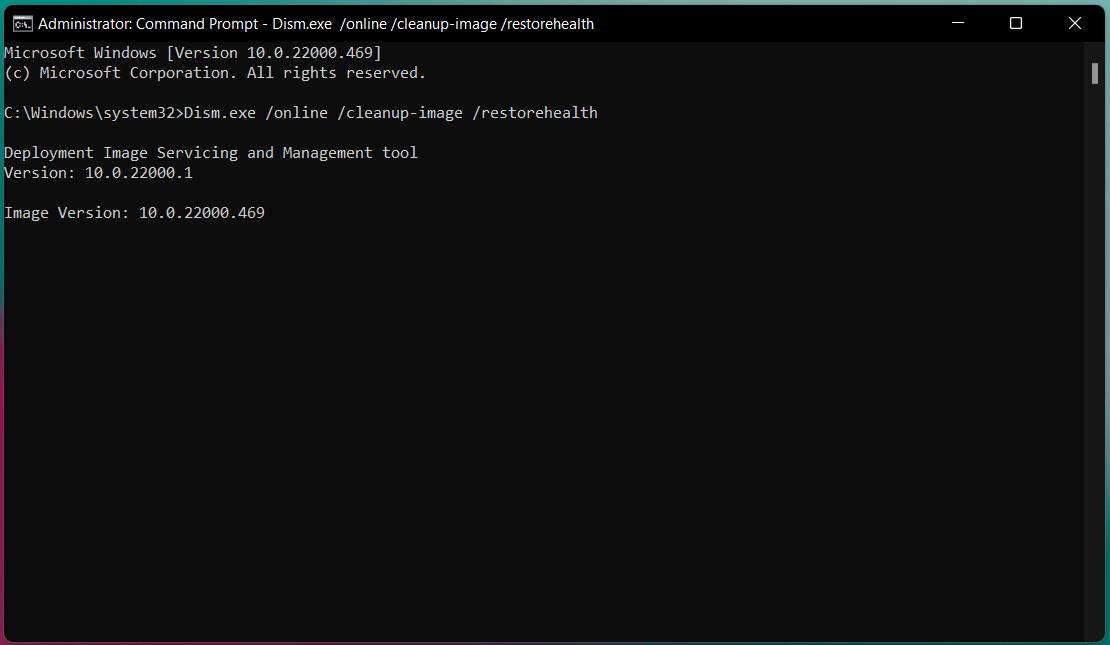
The DISM command commenced.
Now, you have to wait for a while.
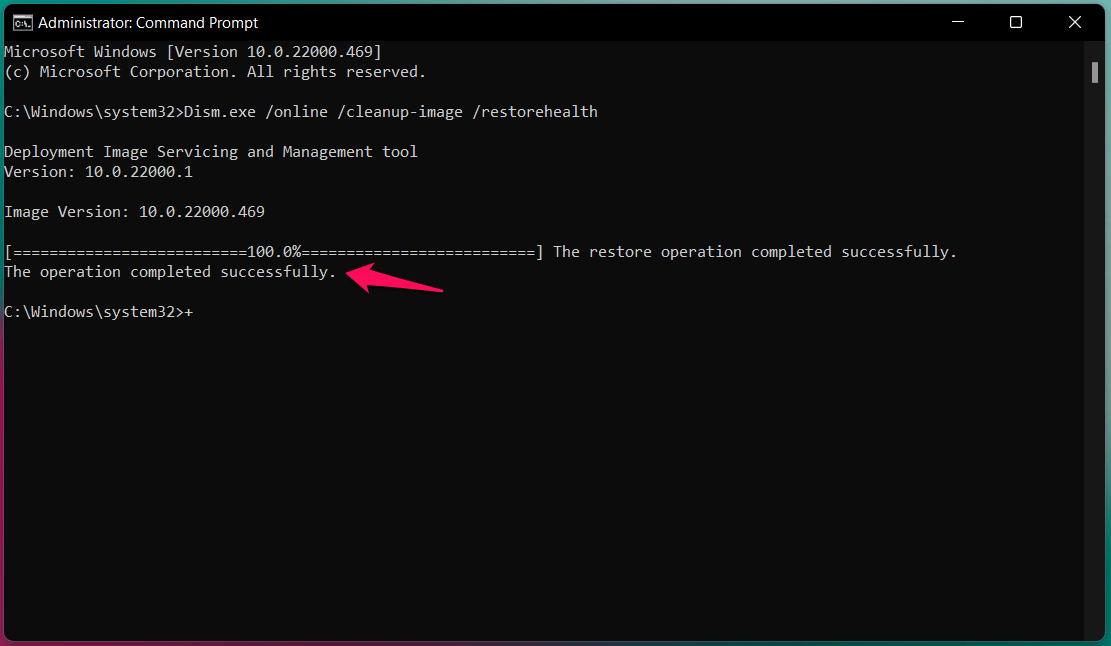
You can monitor the scanning process and find out the remaining time with the progress bar.
Close CMD when the “The operation completed successfully” messages show up on the screen.
Close the Command Prompt and perform System Restore in Windows 11 machine.
5. Perform System Restore from Recovery Options
I created a bootable Windows 10 flash drive from Microsoft’s media creation tool. You can use Windows 10/11 bootable flash drive to perform the system restore. Windows threats might be interrupting the operating system while performing the task. The Windows OS is inactive, and the USB flash drive has a built-in repair tool, which finishes the task efficiently.
Create a bootable Windows flash drive using Microsoft’s media creation tool.
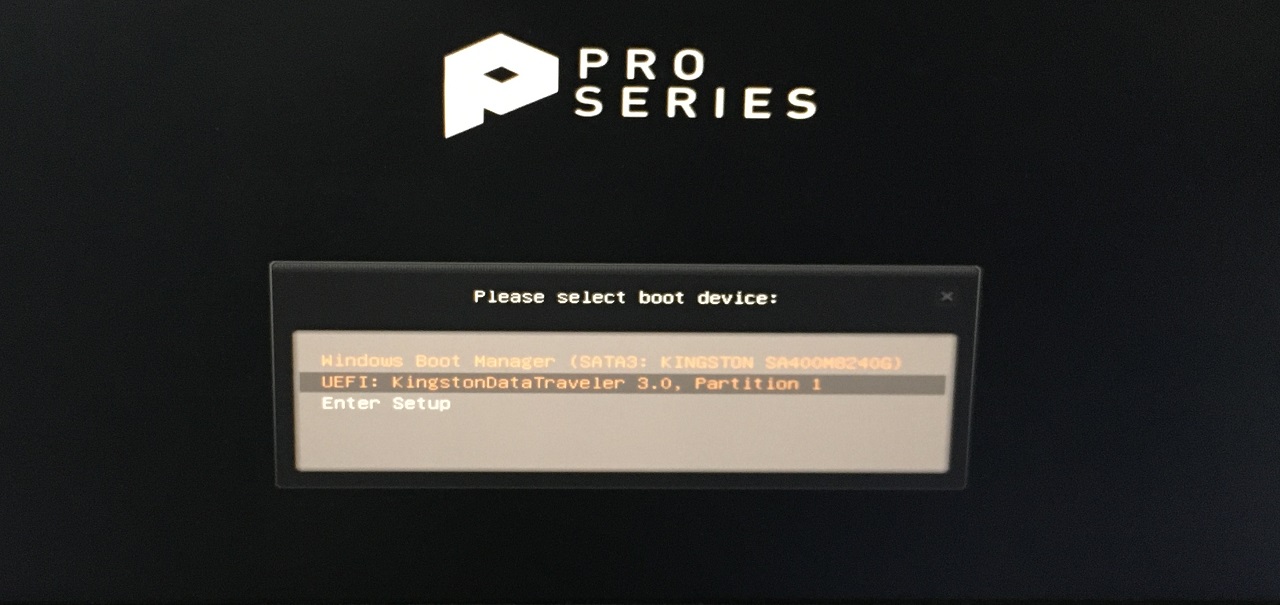
Choose the USB flash drive in the boot menu.
Note: You can find the boot menu key online, and F11 is the MSI motherboard boot menu key.
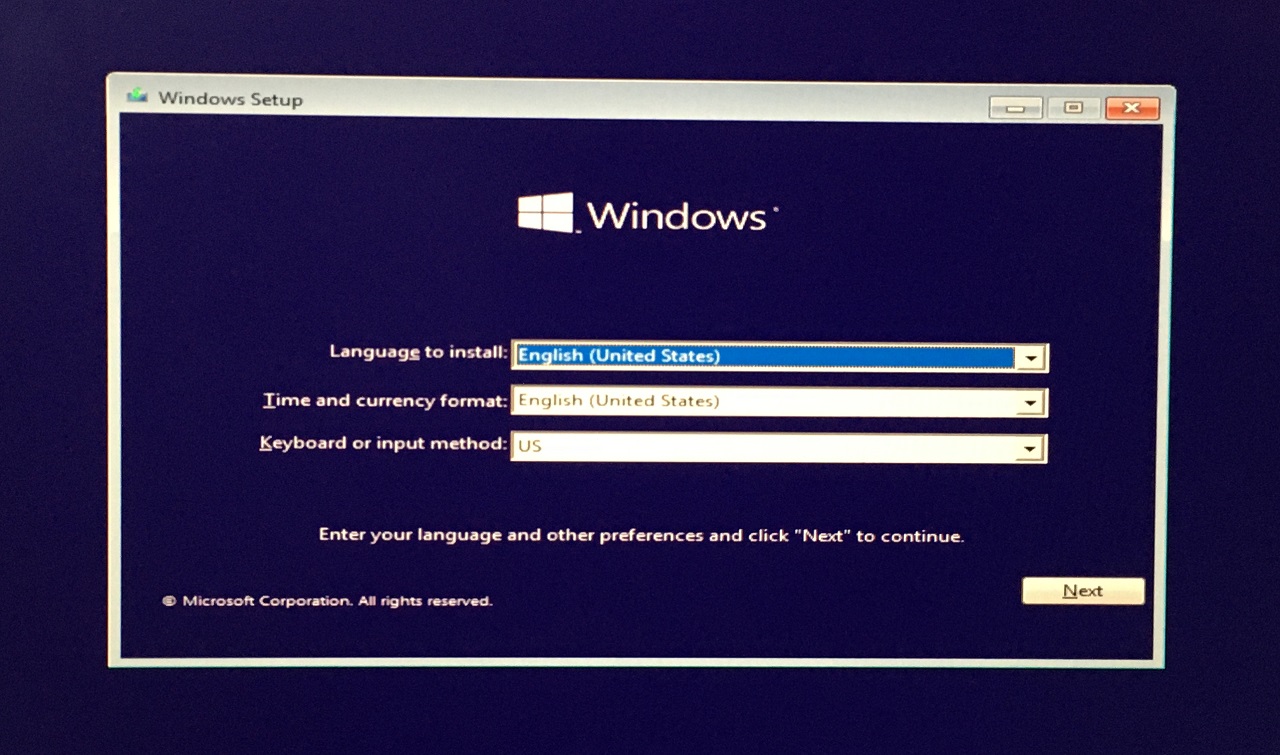
Click on “Next” to continue.
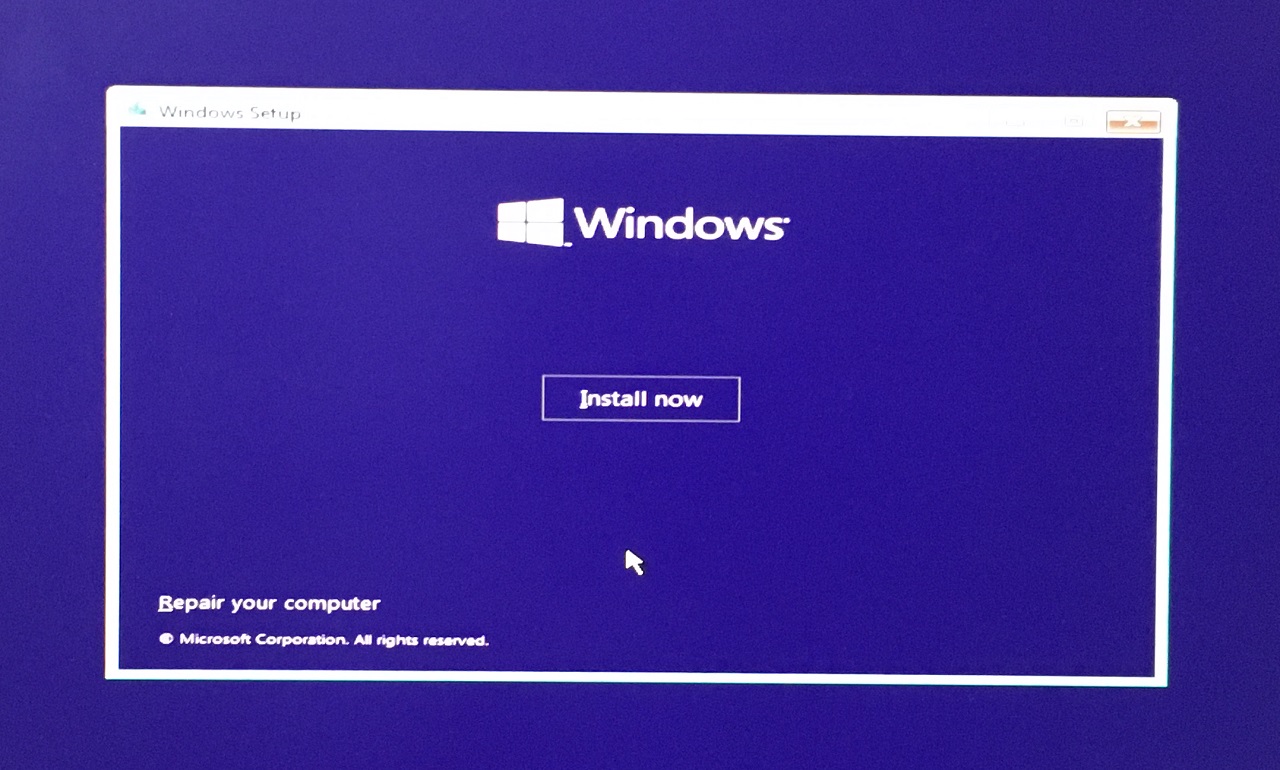
Click on the “Repair your computer” option.
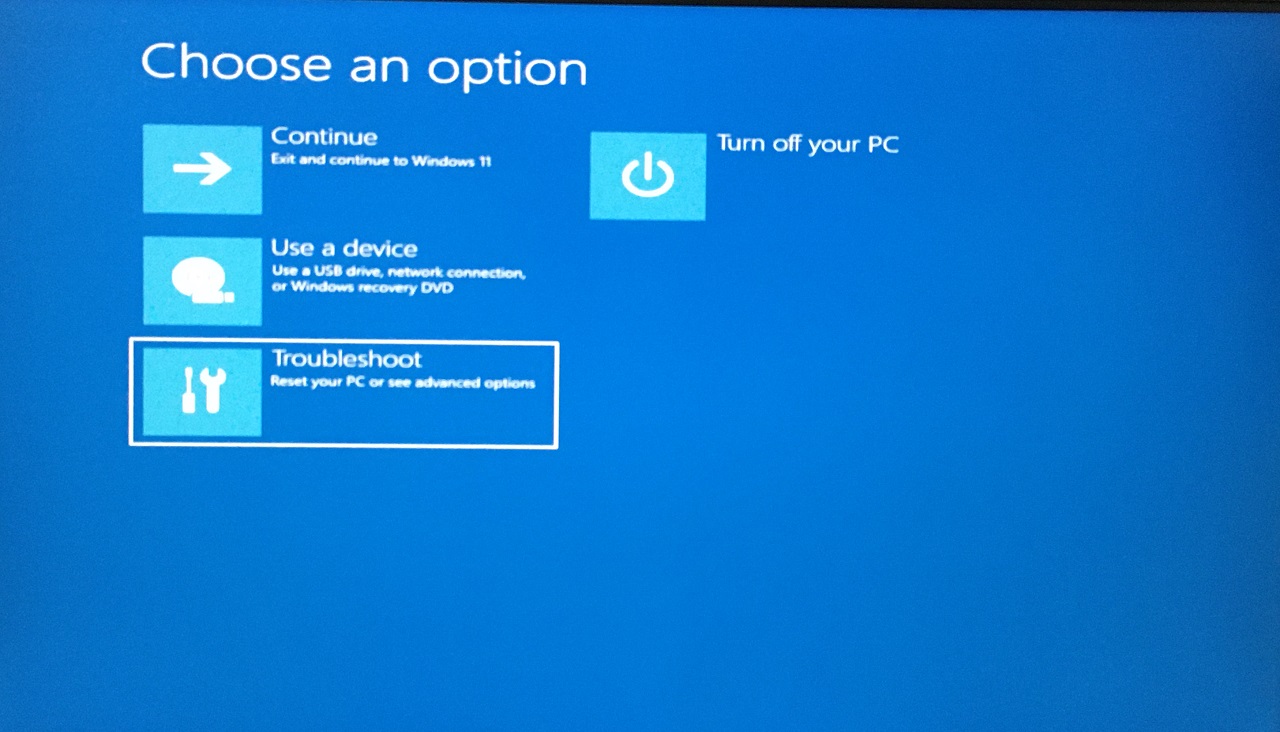
Click on the “Troubleshoot” option.
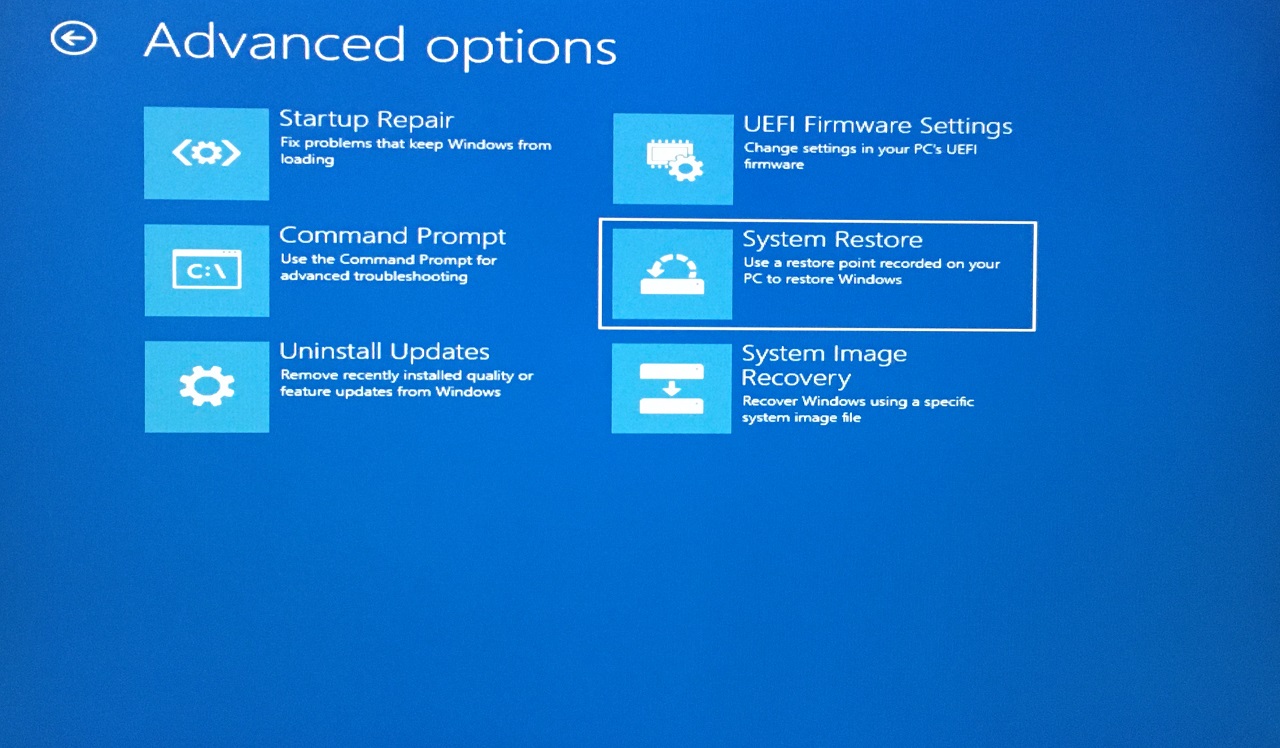
Choose the “System Restore” option.
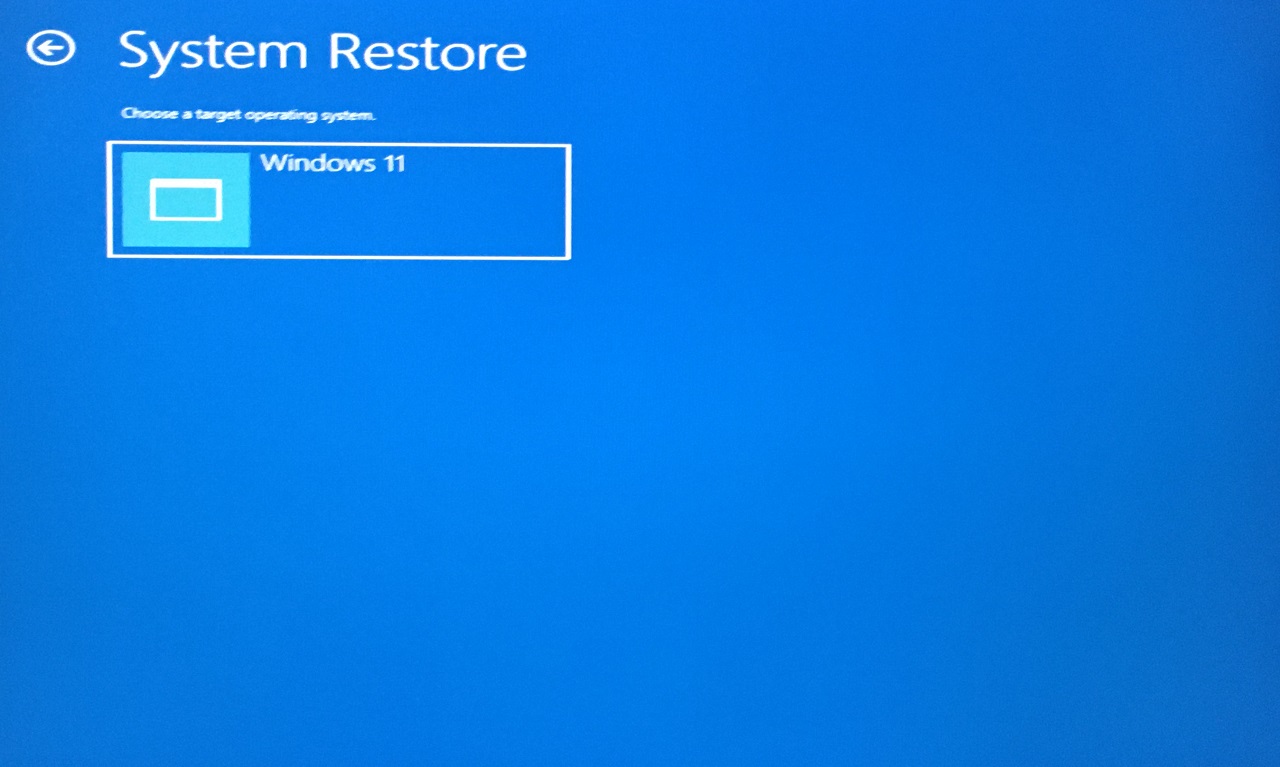
Select the installed operating system if you have multiple drives.
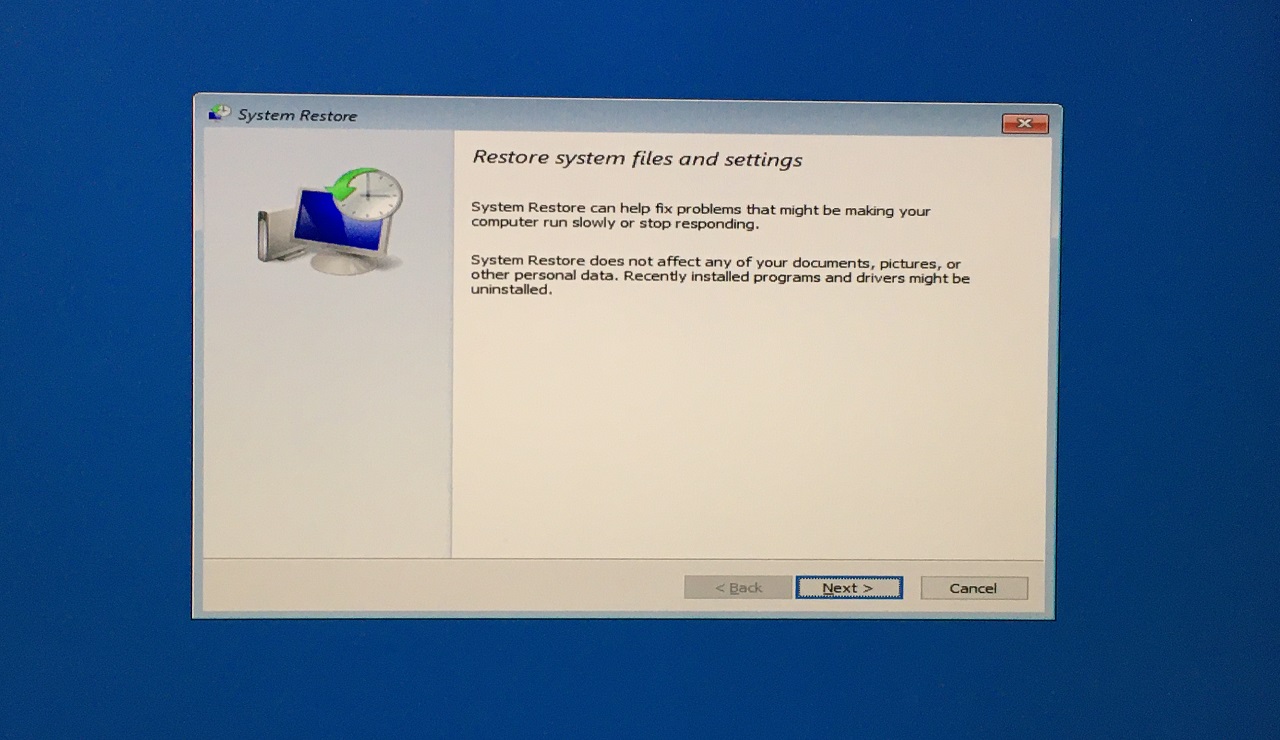
Click on “Next” after System Restore loads up.
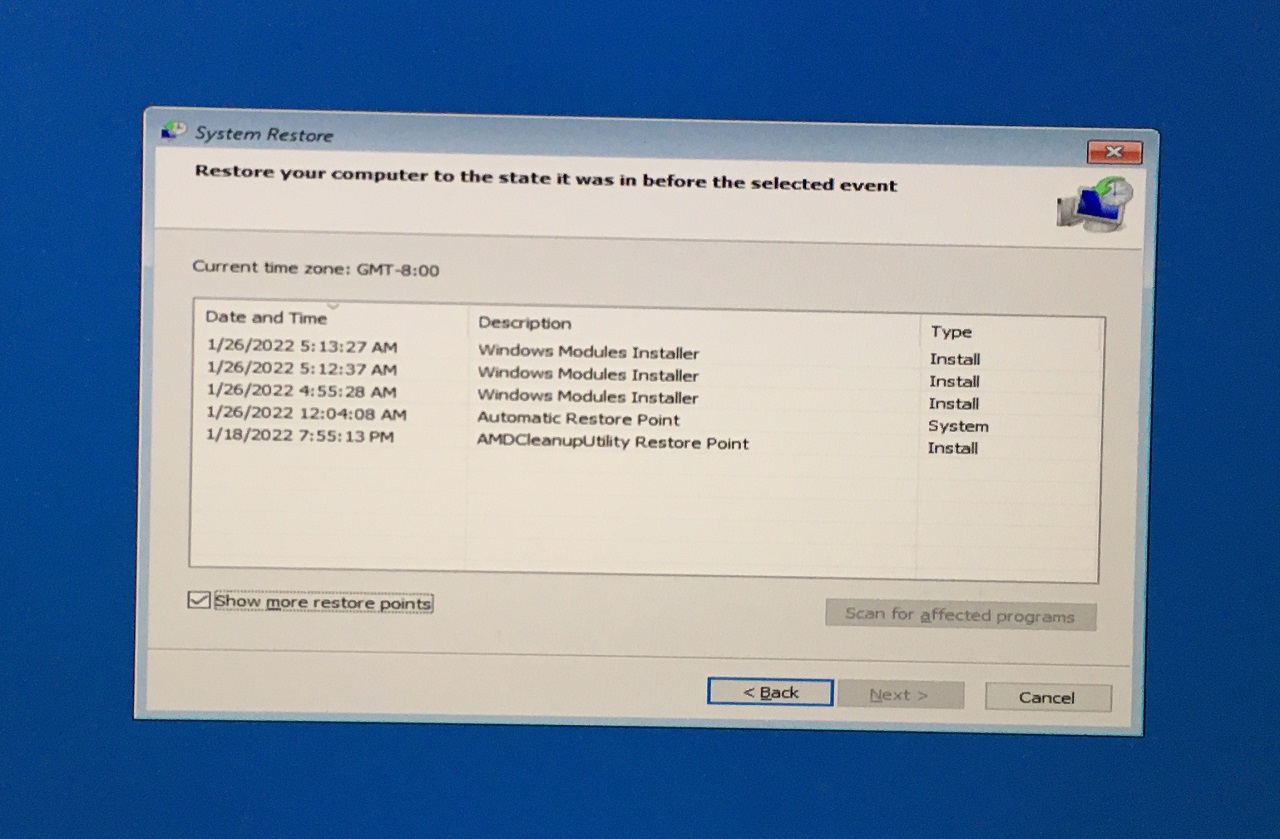
Click on “Show more restore points” to view hidden points.
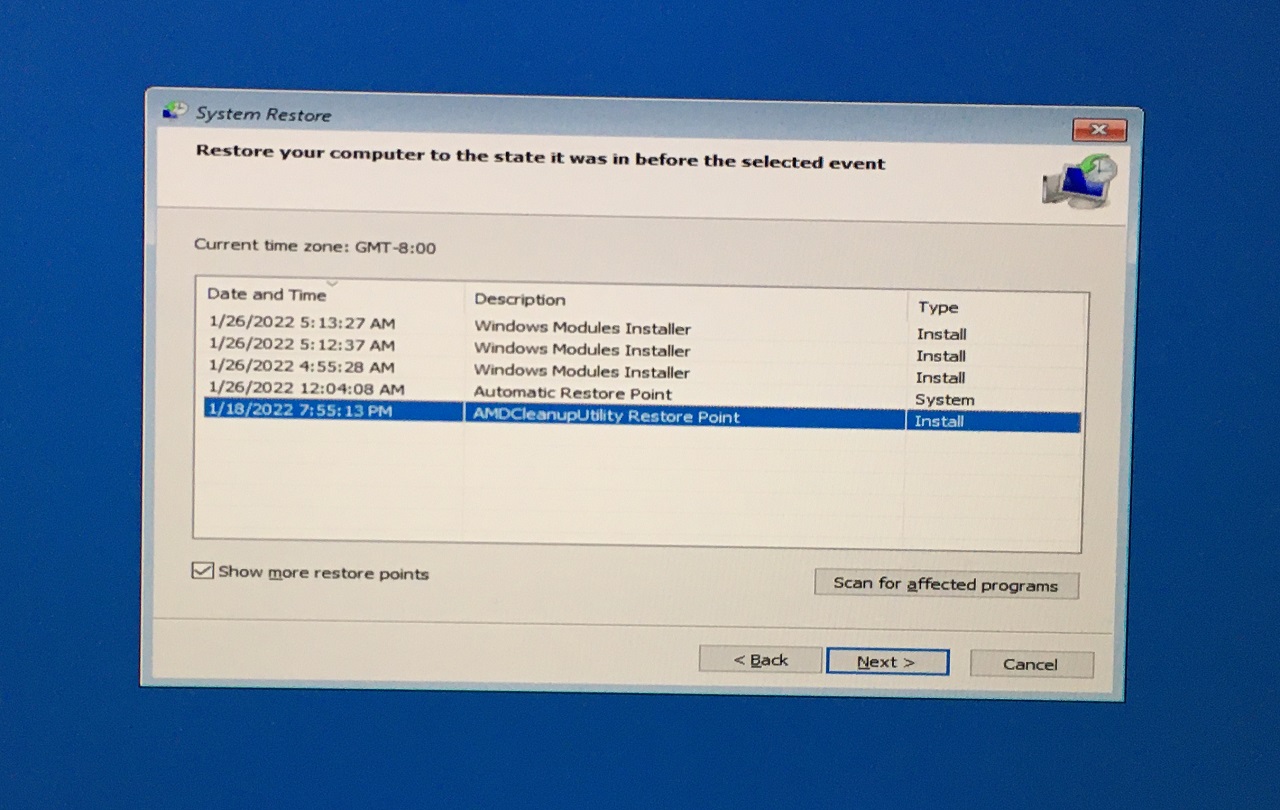
Select the restore point, then click on the “Next” button.
Click “Finish.”
Now, you should leave the task to the built-in Windows repair tool.
7. Reinstall Windows 10/11
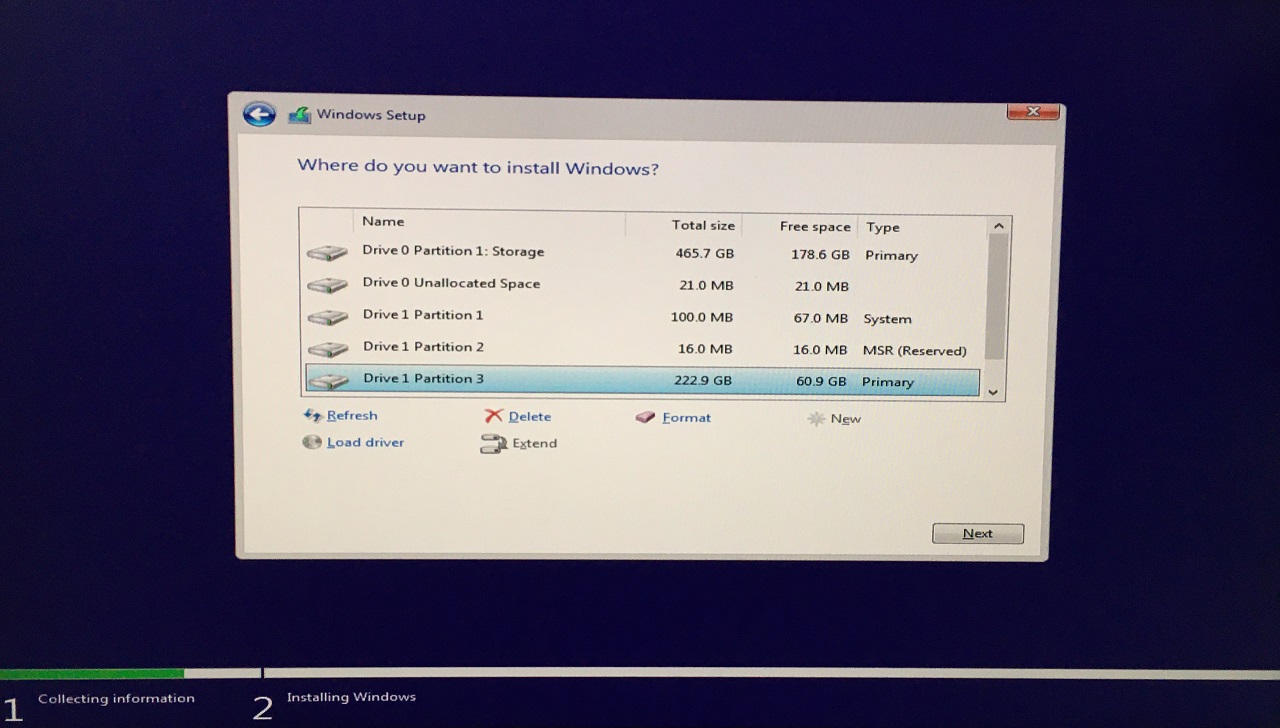
Pirated Windows is the primary reason why your system has malware and other kinds of threats in the machine. I asked you to create a bootable USB flash drive for a reason and reinstall the software to get rid of the threats. Make sure to back up the stored data in the external drive or cloud storage, so you don’t suffer from data loss.
Bottom Line
Users should be able to resolve the Windows 11 system restore 0x80070005 error code by following official solutions. You should reinstall the operating system instead of resetting the software because most of the malware will prevent it from happening in Windows 10. Create a bootable Windows USB flash drive from a different computer so the malware doesn’t interfere with the issue. Let us know which solution helped you resolve the system restore issue in the comment section below. If you’ve any thoughts on Fix: System Restore Did Not Complete Successfully (00×80070005) in Windows 11, then feel free to drop in below comment box. Also, please subscribe to our DigitBin YouTube channel for videos tutorials. Cheers!
[Fixed] Viber Not Working on Android | Keeps Stopping Error Fix – Site Can’t be Reached: Server DNS Address Could not be Found How to Fix Live Captions Not Working on Chrome Browser?
Comment * Name * Email *
